How to draft sleeves pattern
Instructor : Savitha
Skill Level : Beginners 00:04:14
Views (7535)
Rating (9)
Class Description
Learn to draft sleeves pattern in a step by step and easy way. Practice till you get it perfect.
Class details
| Sleeve pattern | 00:04:14 |
Please login to submit your questions
A :
Hi,
Increase the cap height a little and ease on the armround line a little. May be by around 1/2". That should give you the needed measurement.
A :
Cap height is the distance from the shoulder tip to the biceps.
A :
Did not receive any reference image here.
What is the issue you are facing when you draft the sleeves pattern as shown in this class?. Why do you want to create a very deep curve at the front armhole? Sorry the question is not very clear to me.
A :
Hi,
8 or 8.5" is fine. Just measure straight. This measurement was given only so that beginners get a rough idea on which part of the scale to use. You just need to get a nice smooth curve.
A :
Hi,
Is there anything I can help you with?
A :
Hi,
Cap height remains the same, only the length of the sleeve increases. Check our free tutorial on drafting different sleeve lengths.
https://www.savisfashionstudio.com/sleeve-drafting-theory
A :
In your question "From the mid point, you marked 1/2" inward towards body side to make back arm hole curve." - Are you referring to the sleeves pattern? Do you mean 1/2" marked above from the midpoint. If yes, this remains the same for drafting the back curve in the sleeves pattern.
A :
Yes, this marking is done just to give an idea to beginners as to which part of the armhole curve ruler to use. This can be used for all sizes.
A :
Hi,
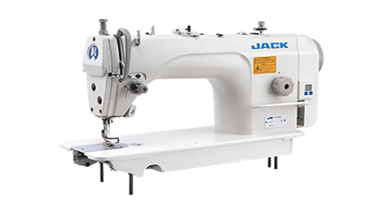
Which presser foot are you referring to? The presser foot meant for industrial sewing machine will suti Jack F4.
A :
We normally add the seam allowance on fabric before cutting the fabric. We do not include the seam allowance in the paper pattern. However, if you wish you may add the seam allowance in the pattern and then cut the pattern.
A :
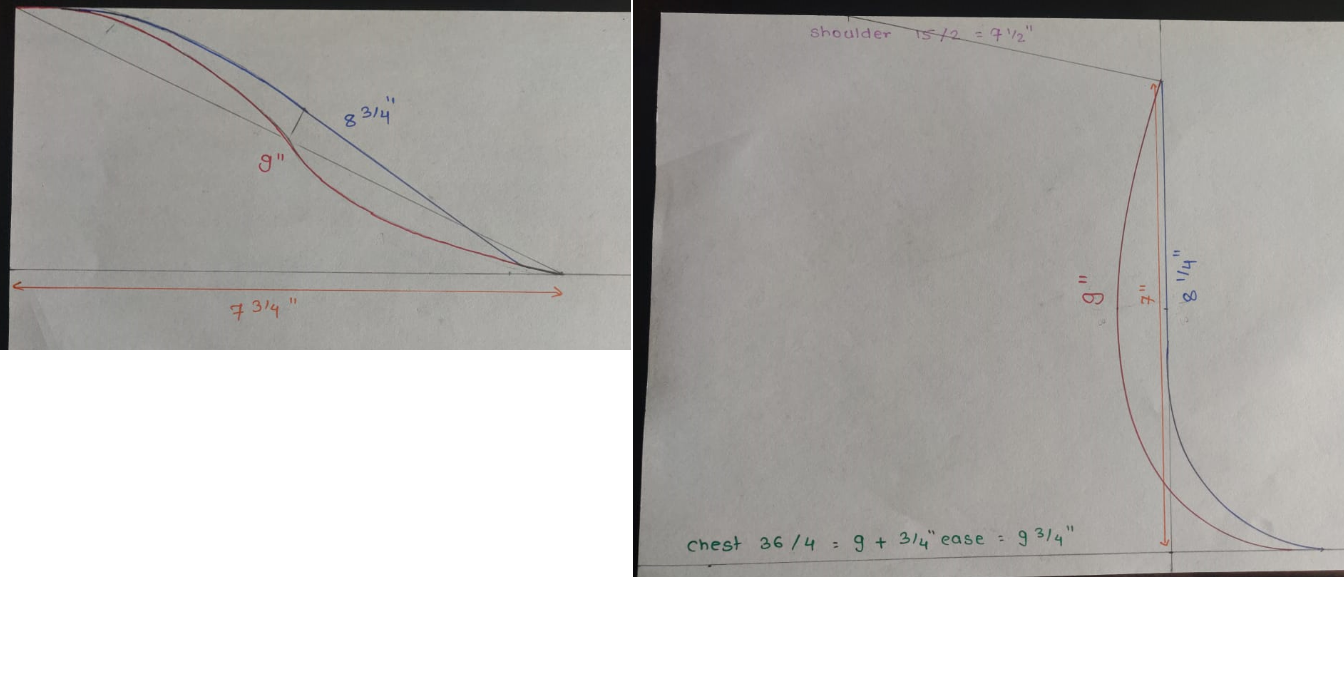
In the sleeve pattern, you may reduce the ease given by 1/4" and redraw the curves. While sewing slightly stretch the front sleeves only in the curved part.
A :
Hi,
Are you getting a difference when attaching sleeves to the armhole?
A :
Hi, that's great. Once you complete the garment, kindly take a clear picture and upload in the "Project upload" link below the concerned class and also kindly take time to leave a review/rating for the classes you enroll.
Happy Sewing!
A :
Hi,
If the same armround and cap height measurement is used while drafting the sleeves pattern, how would it change everytime? Are you saying it is not matching with the body pattern armhole? That could happen if the shoulder measurement varies.
A :
It can be used for all sizes, I just marked it to make it easy for beginners to get an idea as to which part of this scale to use.
A :
The marking on the armhole curve scale is done only to give an idea to beginners as to which part of the scale to use. Yes the marking can be used for blouse sleeve drafting too.
A :
Hi Usha,
After drafting the body pattern, always measure the front and back armhole curves and see that it matches with the body armhole measurement plus ease. If less/more - shift the chest line down/up and redraw the curves.
Then draft the sleeves pattern and again you need to measure the front and back curves and it should match with the body pattern. If less/more - increase/reduce the ease and redraw the curves.
Also you may end up with excess fabric in sleeves, if you unknowingly stretch the sleeve fabric when sewing.
A :
Thank you.
Do you mean the back part of the sleeves is longer then the front?
A :
In sleeve drafting, use the original armround measurement. After drawing the curves, again measure the front and back curves and if less/more, increase/reduce the ease and redraw the curves.
FAQ'S
1] How do I enroll for premium classes?
Click on the class you wish to take and 'ADD TO CART'. You would need to SIGN UP/LOGIN if you have not yet done. Then 'CHECKOUT' and select the payment method. Give your payment details and once the payment is successful, you would have access to the class.
2] I have paid for a class, now how do I view it?
Login and click on 'My courses' on top. That will show you the number of classes you have taken. Click on the class you wish to learn from.
3] How do I ask questions if I need any clarification regarding the premium class?
Click on the Q & A tab below the video, type in your question and submit. We will reply at the earliest. When you receive the reply you will get a notification alert and the reply will be below your question under the respective class.
4] What is the validity of a premium class?
The validity of the class is 1825 days that is approximately 5 years from the date of enrolment. You will be able to view the class any number of times, any time of the day and on any suitable device, within this validity.
Students Who Viewed This Class Also Viewed
About the Instructor
 13623 Students
95 Courses
Savitha
Instructor Profile
Ms. Savitha has been conducting classes in Pattern making and sewing since the year 2010. She started with her Online classes to reach out to more students. Her words, "I love sewing and teaching and I have been lucky to be able to make my passion, my profession. I try my best to simplify things and teach in a simple and easy way so that even beginners in pattern making and sewing are able to learn from our online classes and make their garments with professional finish".
Reviews
Very easy and simple explanation
With Ur clear and crisp explanation sleeves came our perfect thank you so much mam
With Ur clear and crisp explanation sleeves came our perfect thank you so much mam



![Saree blouse Class 1 - Foundation class [Choli blouse]](https://www.savisfashionstudio.com/uploads/images/medium/e6f0eacf67e9d2677c8bc800cc6b8c01.jpg)
